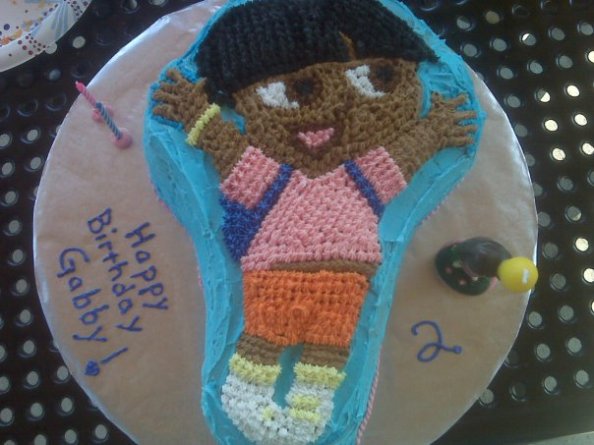
My first attempt at a child’s birthday cake – Dora the Explorer

14 Sep

ImageThere are quite a few mistakes with this cake, but I wanted to give everyone a starting point for what I have done with birthday cake making.

This cake was for my niece’s birthday back in 2009. I used a Wilton cake pan which is a nice start for people starting out in decorating. It’s pretty much like color by numbers; make your colored icing and pipe along the lines until everything is filled in.The cake was just a box cake because I was crunched for time, I cannot remember the brand. I probably also used the Wilton white tub of icing to color my own frosting along with the Wilton dyes.

*I want to make a note right here before I continue: all the baking I do now is from scratch. I make my own cake mixes and frosting. As for the dyes, I have not used all natural ingredients as of yet. This is something I would like to research so I can be completely natural in all of my baking. I’ll make another blog post when I do so.*

I think this is an ok start to making cakes even though there are some obvious mistakes you can see right off the bat. I would also like to point out that this was taken with an old cell phone camera. I haven’t actually taken any food shots with my new camera (Nikon D7000) but I am going to hopefully start this weekend.

Some of the things I learned when doing this cake

1. Make sure you have enough time before the cake has to be delivered! I worked my tail off right up until we walked out the door to go to the party.

2. Only use a little bit of dye when you start coloring your icing. As you can tell, Dora is a bit dark for my liking. If you want it that way well then hey that’s great, but I feel that she is a lot darker than the TV Dora.

3. Make sure you can’t see any gaps in the icing. Piping takes practice.

4. Ice the background first, and then do the character.

5. Do you major outlines first and then fill in.

6. If your hand gets tired, take a break! I have wrist issues so this is a constant reminder for me. It might take longer, but at least you won’t have sloppy work.

I knew this would happen….

13 Sep

I posted one blog and then didn’t post anything else!

I have a nasty habit about posting everything to Facebook, and leaving it at that. Well, I’m going to make a commitment to myself right now to post something at least once a week. There, it’s in writing, and everyone can hold me to it!

I’m going to see about taking my pictures and posts from Facebook and transferring them over to this blog. But for now… on to my Marketing homework. Let’s work on the degree first and then cook!

So now I’m 29 . . . (and making taco salad)

30 May

. . . . and I’ve never had a blog before outside of a social media website like myspace or facebook. Instead of doing poetry like I’ve done in the past, I’d like to focus on other passions of mine – food and photography. Pictures of recipes that I’ve created and recreated, and if you’re lucky the recipe might just be included. 🙂 Most of the time it will because I believe that good food should be shared with good friends. Although, you have to have a family secret or two tucked in a back pocket.

Tonight I’m cooking an old classic I haven’t had since I was a child: Taco Salad!

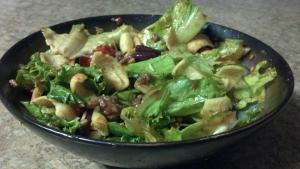
Just as I remembered it!

1 lb ground beef, drained

1 package taco seasoning

2/3 c water (or however much is specified on the seasoning package)

1 15 oz can red kidney beans

1 head of lettuce (I like romaine or green leaf)

1/2 c tomatoes (I used champagne tomatoes)

1/2 c shredded cheese (you can use a mexican blend, I had cheddar on hand)

Catalina dressing (I used Kraft)

Corn Chips (I used an off brand of Fritos. I’ve seen other people use Doritos or tortilla chips)

Brown beef and drain the fat. While the beef is cooking drain and rinse the kidney beans. After the beef is browned add the water and the taco seasoning as instructed as well as the kidney beans. Simmer as instructed on the package stirring occasionally and then set aside to cool. While the mixture is cooling, wash and prepare your lettuce as well as your tomatoes. After the mixture is cool, add to the lettuce and tomatoes as well as the cheese and the dressing. I don’t add the corn chips until the salad is in my bowl so they don’t get soggy. Eat up!

You can do so many things to this recipe to make it your own. Add or subtract the amount of cheese you use (I love cheese but my son hates it), add olives, add jalapenos, etc. This version is just the basic version my mom made me as a kiddo. I just had my second helping of it, and I forgot how much I missed it!

Well there you have it; my first real blog post. I hope I stick with it and have many more to come. Ultimately it is my goal to cook many of the recipes passed down from my grandmother. She gave me everything she collected through the years when she couldn’t cook for herself anymore . . . but we’ll save my grandmother for another blog post. 🙂

Happy cooking,

Robyn